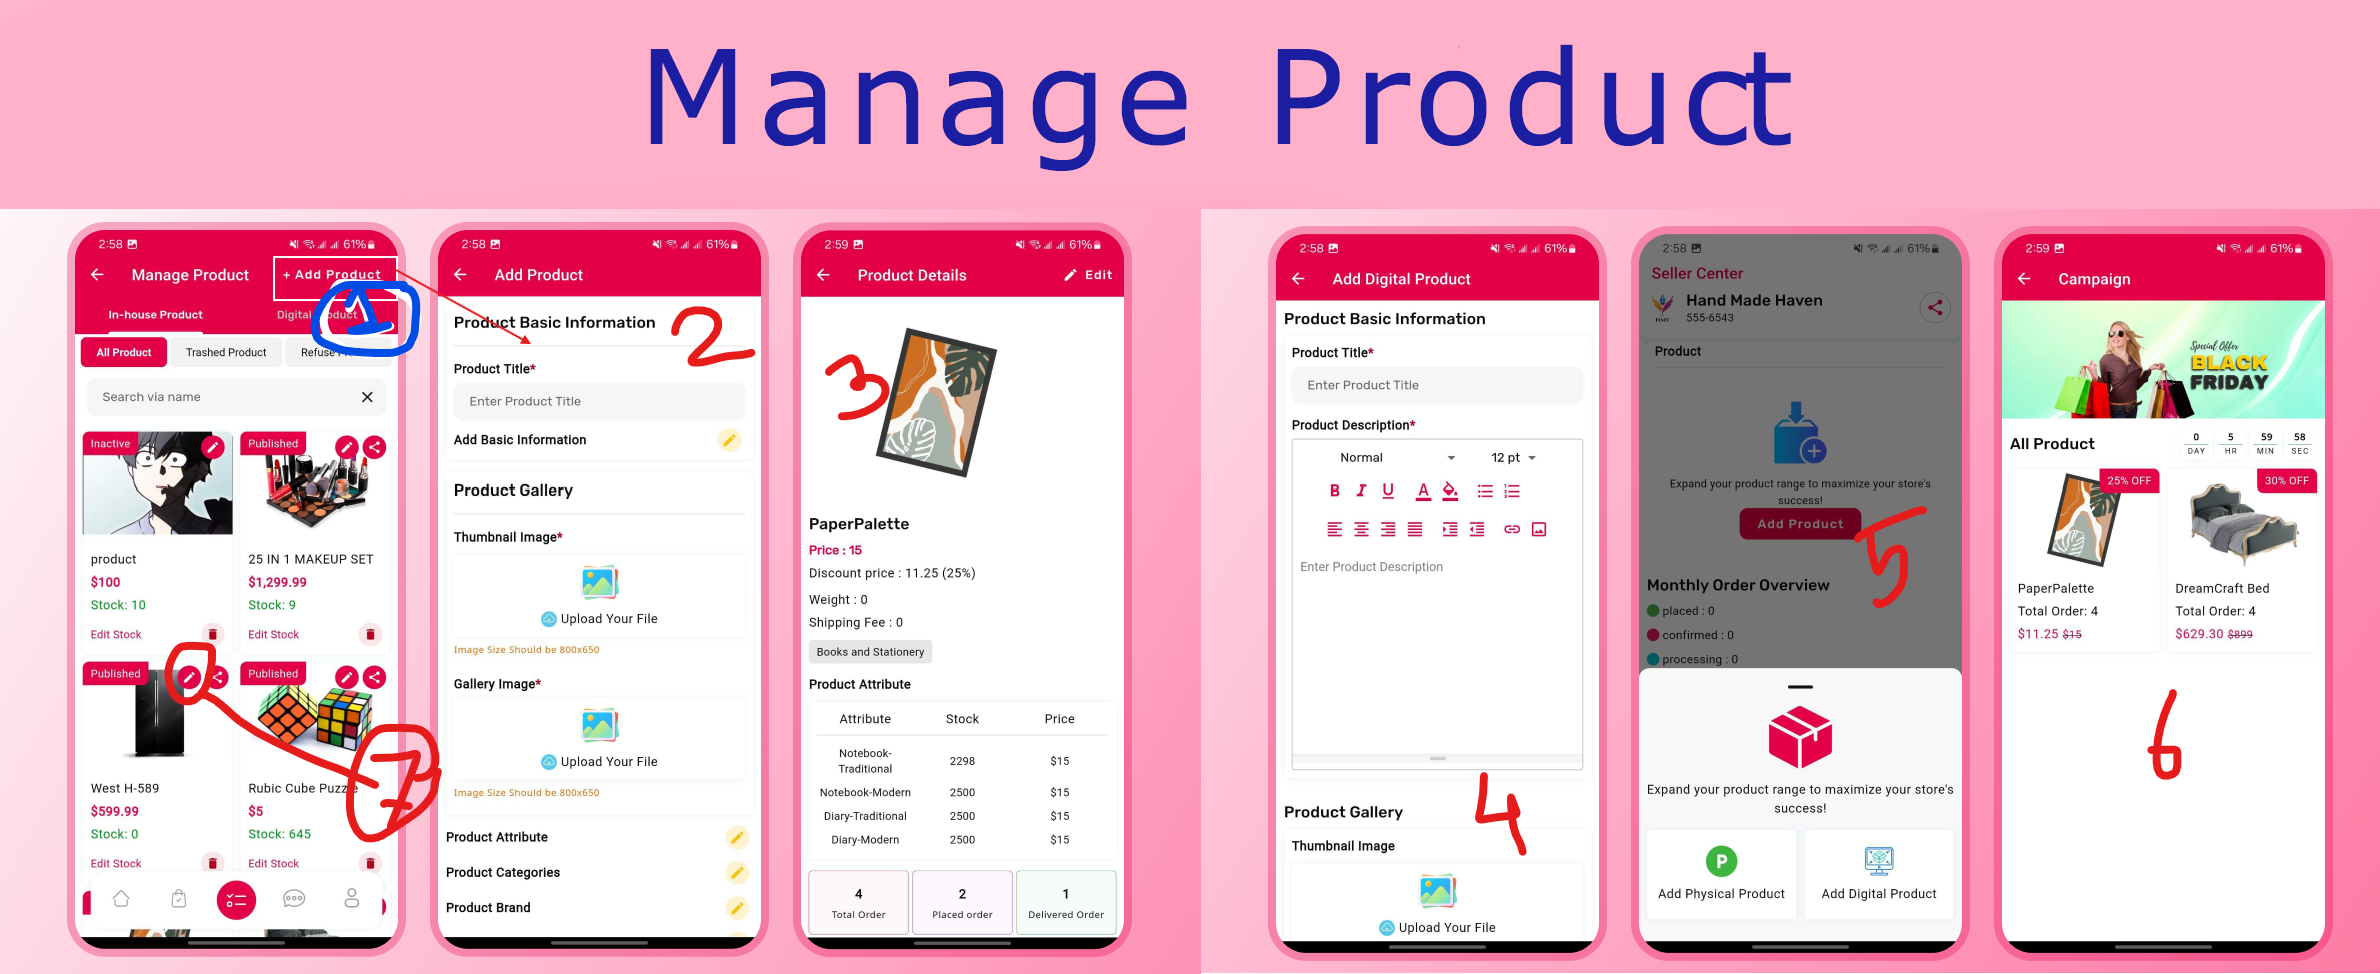
CartUser Seller App
Welcome to the Seller App documentation for CartUser. This guide will help you set up, customize, and release your Seller App built with Flutter.
Flutter Setup
- To install Flutter, visit this website and follow the platform-specific instructions.
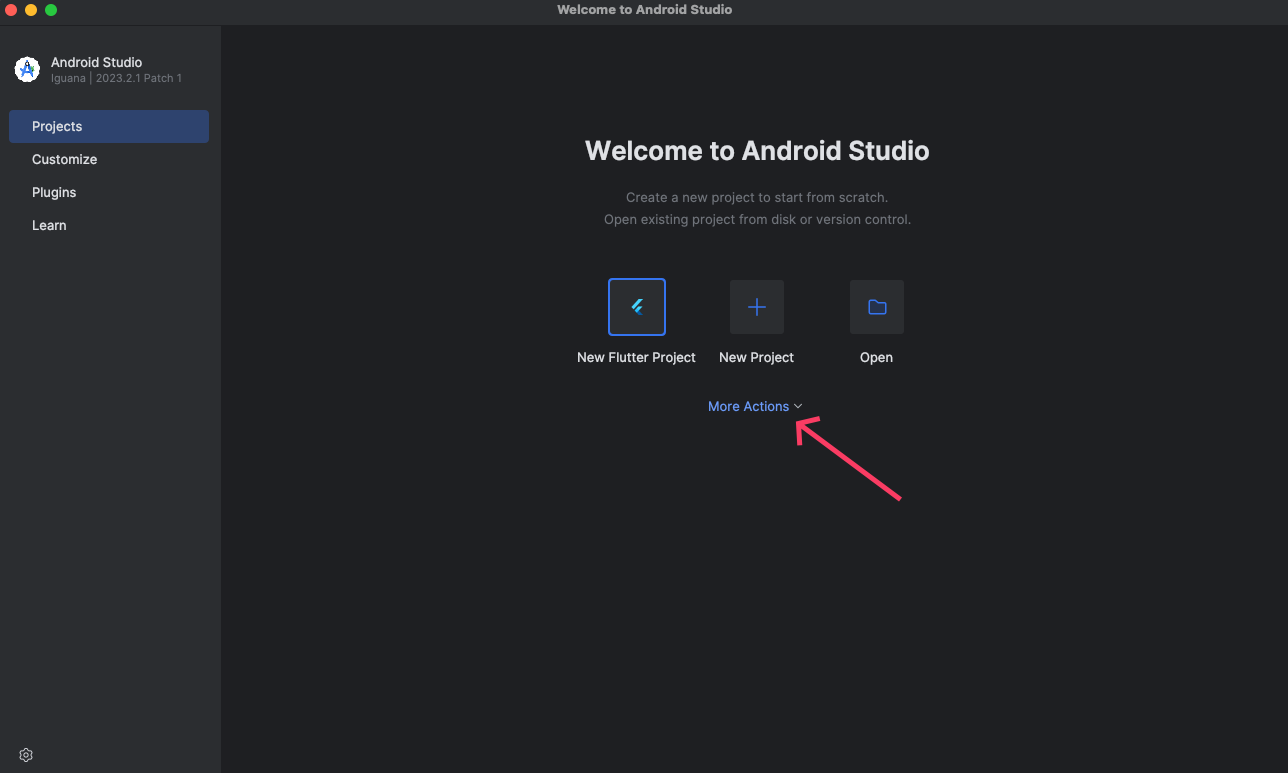
- Download Android Studio.
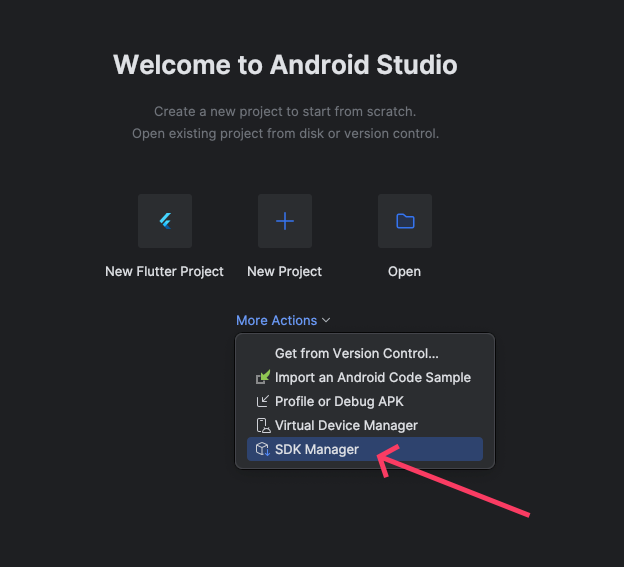
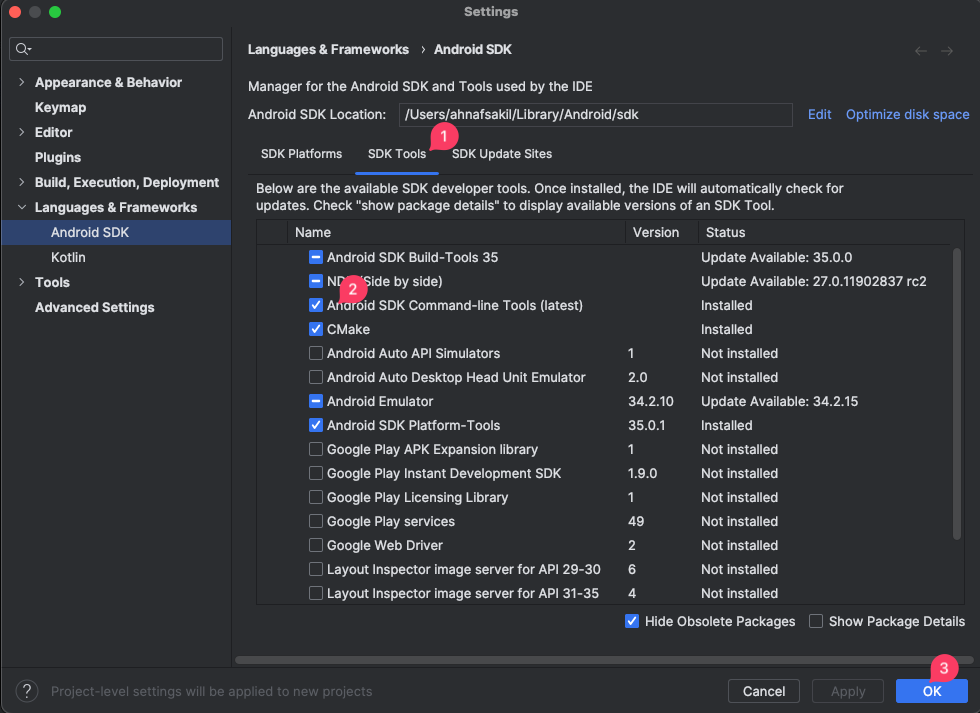
- After installing, open Android Studio and select More Action or the three dots in the top corner. Then select SDK Manager → Android SDK / Sdk Tools. Click Android SDK Command-line Tools (latest) and then apply. It will start downloading the tool.
After download is completed, go to Android Studio plugins section and install Dart & Flutter plugins.
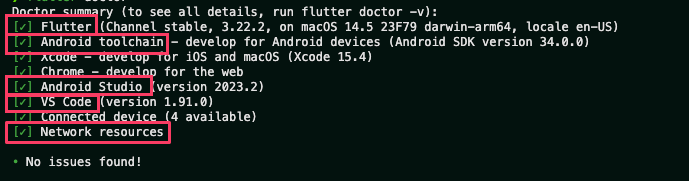
Now run this command in your terminal: flutter doctor
You might need to run flutter doctor --android-licenses if this is your first Flutter installation.
An ideal output will be something like this (marked sections must have a checkmark):
Change Base URL
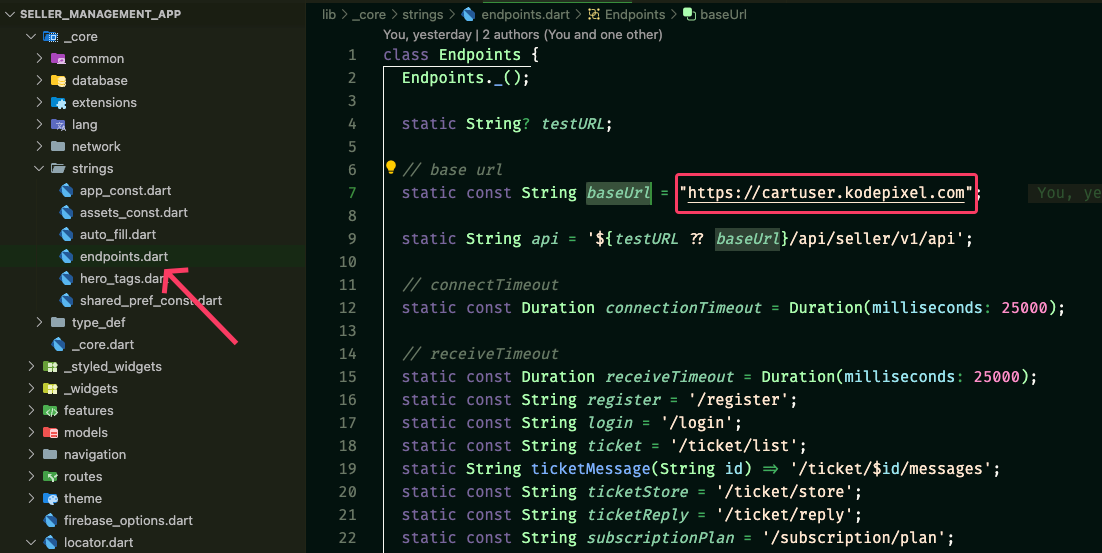
Use your admin URL as the base URL. First, you have to install your admin panel. For example, if your admin URL is https://your_domain.com/admin, then the base URL will be https://your_domain.com (without the /admin). Add it at the end, so the final URL will be https://your_domain.com.
Open [project]/lib/_core/strings/endpoints.dart and replace the baseUrl value with your own URL.
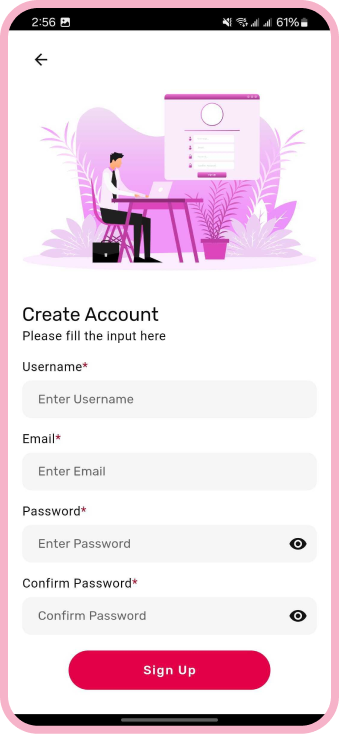
App Appearance
Change App Logo
- Place your logo in the
[PROJECT]/assets/icon/folder. - The logo name should be
app_logo.png. - Run
dart run flutter_launcher_iconsin the terminal.
Change App Name
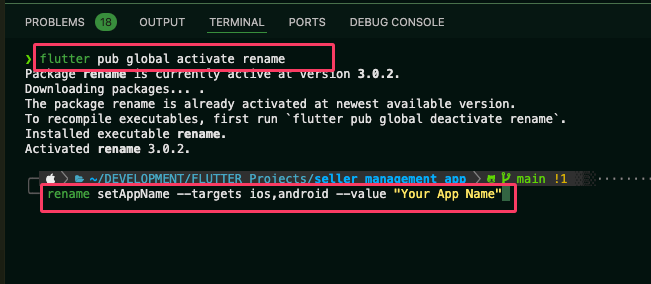
- Activate rename by running
flutter pub global activate rename. - Change the app name by running:
rename setAppName --targets ios,android --value "Your App Name" - Change the app Bundle/Package ID by running:
rename setBundleId --targets ios,android --value "com.example.bundleId"
com.company.app.
Firebase Config
Create Firebase Project and App
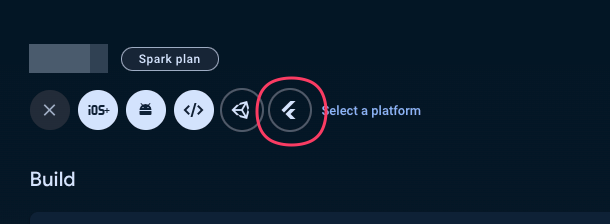
- Go to the Firebase console and create a project.
- From the Project overview, select the Flutter app.
- Install Firebase CLI. You might need to restart the terminal after installation.

- To log in to your Firebase account from the terminal, run:
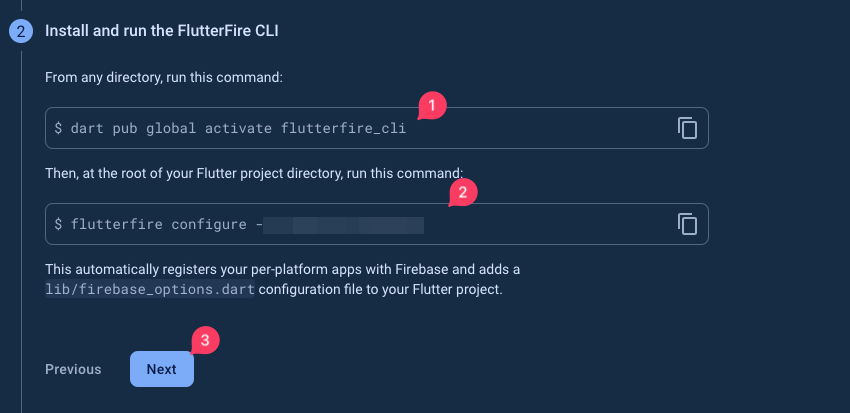
firebase login. - Install FlutterFire CLI:
- Run
dart pub global activate flutterfire_cli. - Run
flutterfire configure --project=your_project_name.
- Run
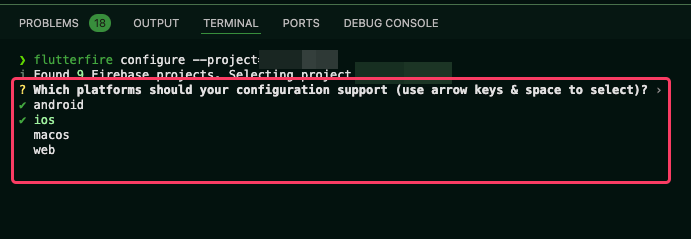
This will create the following files:
firebase_options.dartfile in thelibdirectory.google_services.jsonfile in theandroid/appdirectory.GoogleService-Info.plistfile in theios/Runnerdirectory.
Enabling Firebase in Your Project
To enable Firebase integration in your project, follow these steps:
- Navigate to lib/main.dart.
- Locate the following line of code:
///* To enable FIREBASE, change the value to true; - By default, the line
FireMessage.isFireActive = false;
indicates that Firebase is not active. Once you have configured Firebase from the Firebase Console, set the value to true like so:FireMessage.isFireActive = true;
Create Firebase Json Key
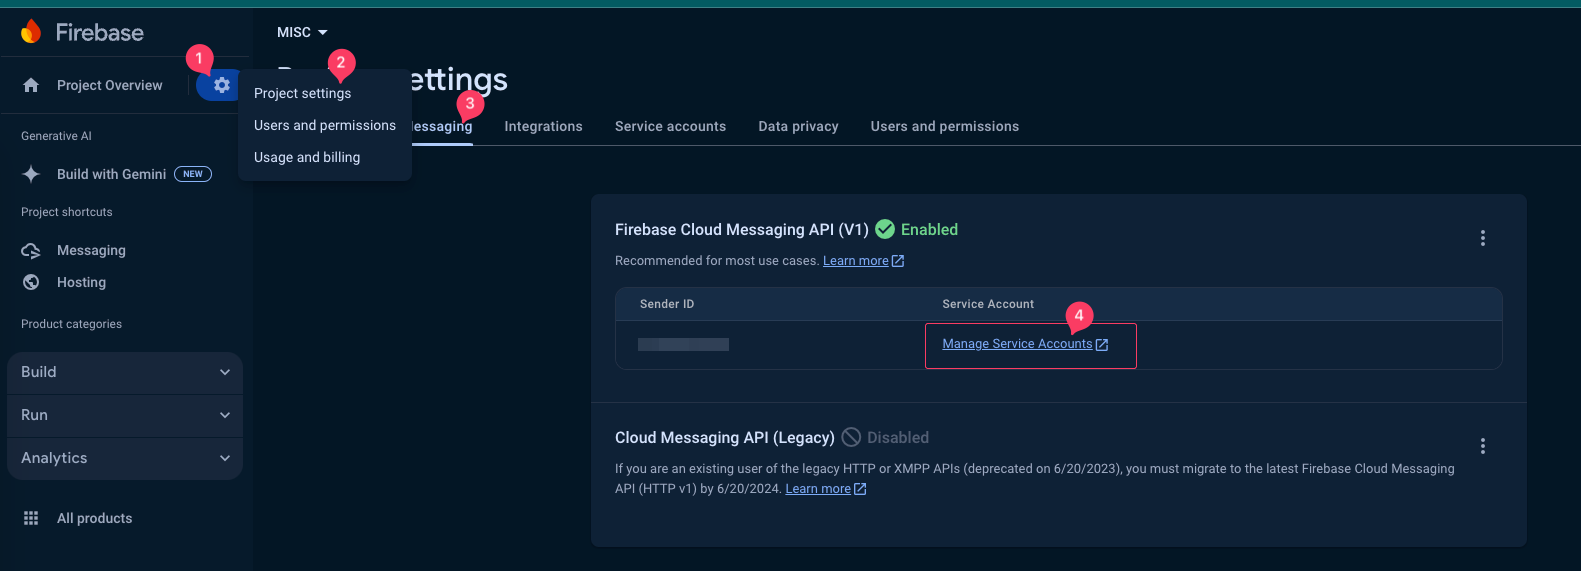
Firebase Cloud Messaging Configuration Steps
- Go to the Firebase console and open the Cloud Messaging tab in project settings.
- Click on Manage Service Accounts.
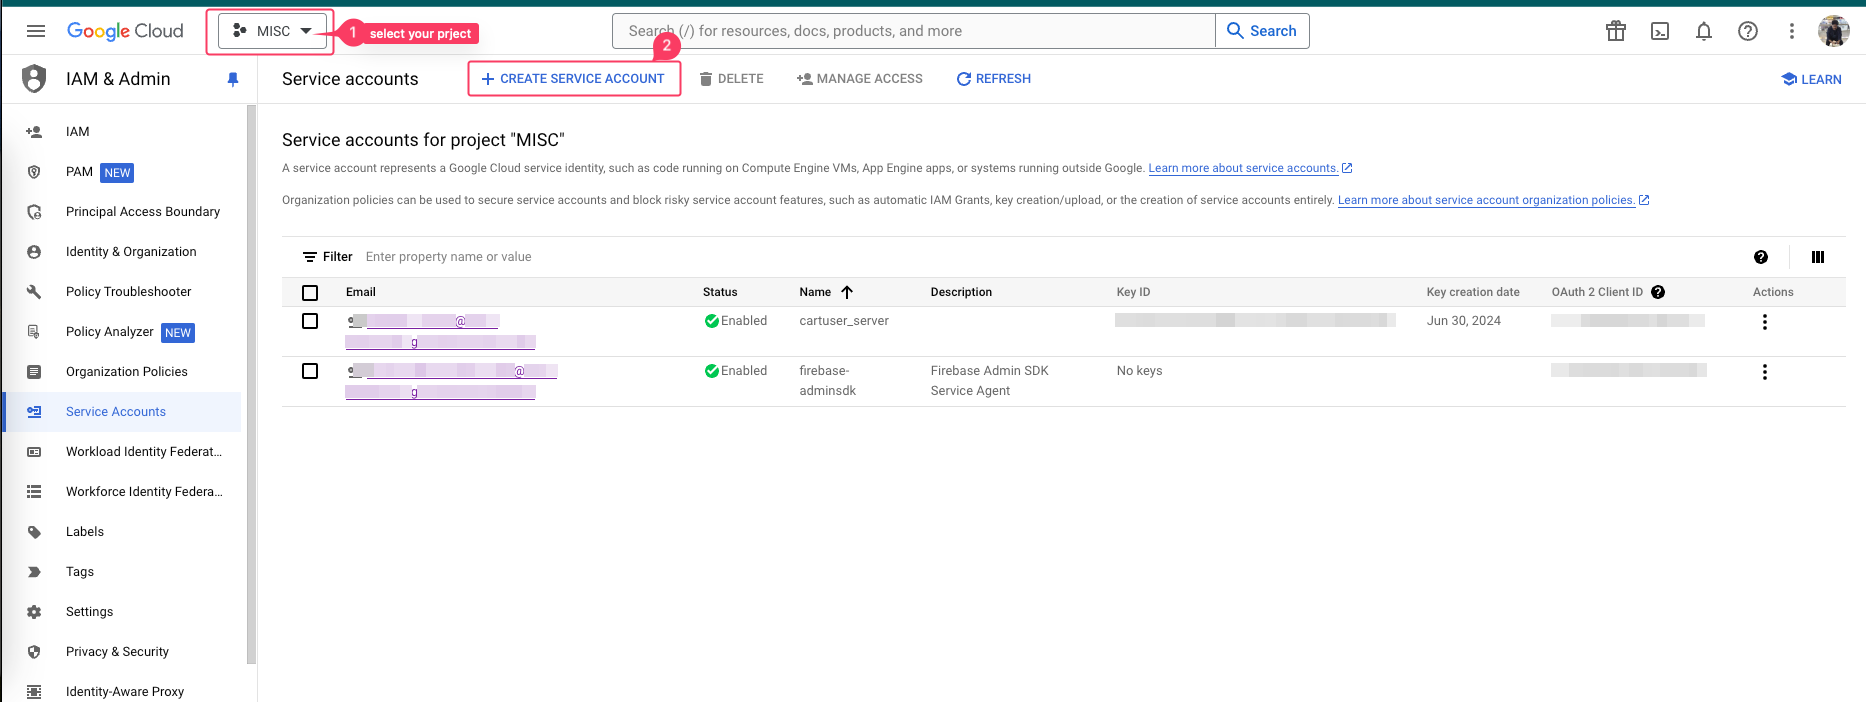
- Ensure the correct project is selected from the dropdown menu.
- Click Create Service Account.
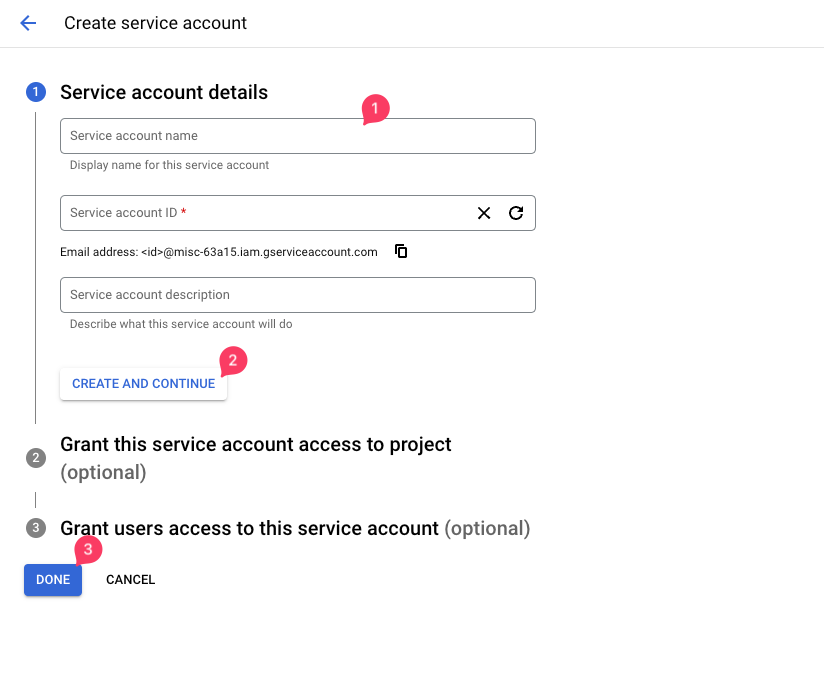
- Fill in the details and continue to the next step.
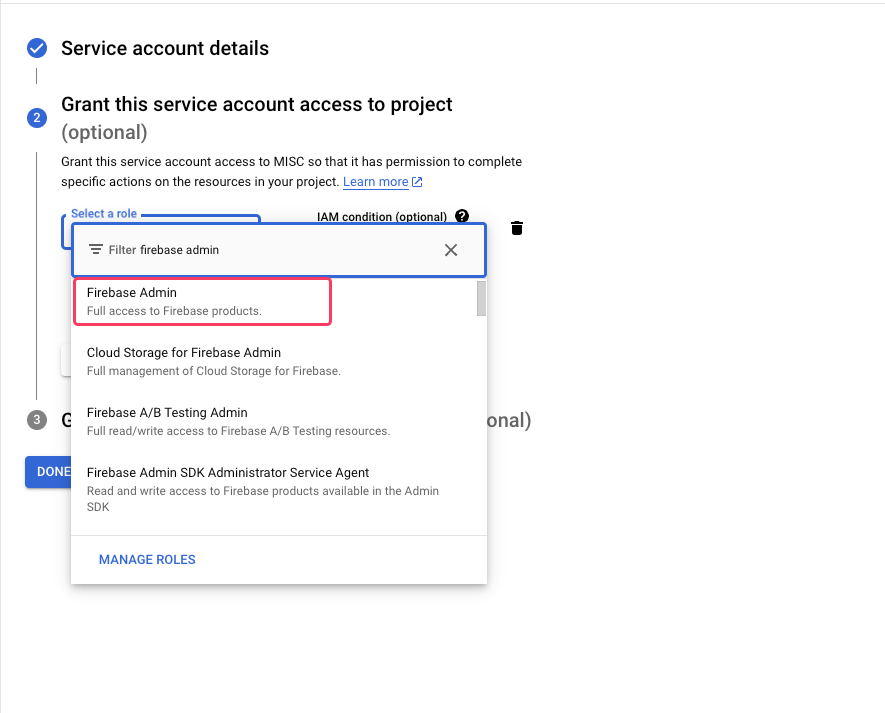
- Click the role dropdown box, search for firebase admin, and select it.
- Continue to the next step and press Done.
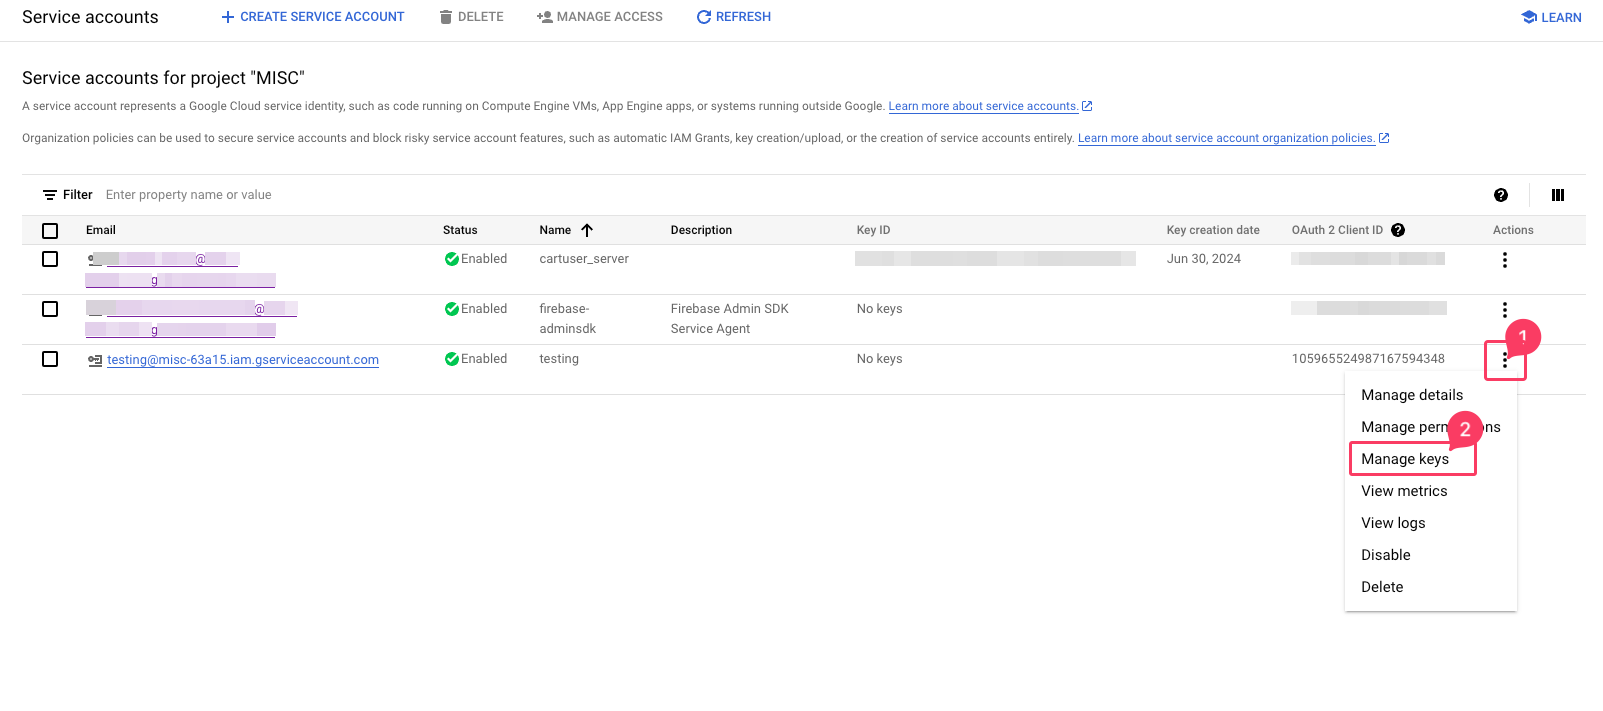
- This will create a new service account. Click the three dots next to the account and select Manage keys.
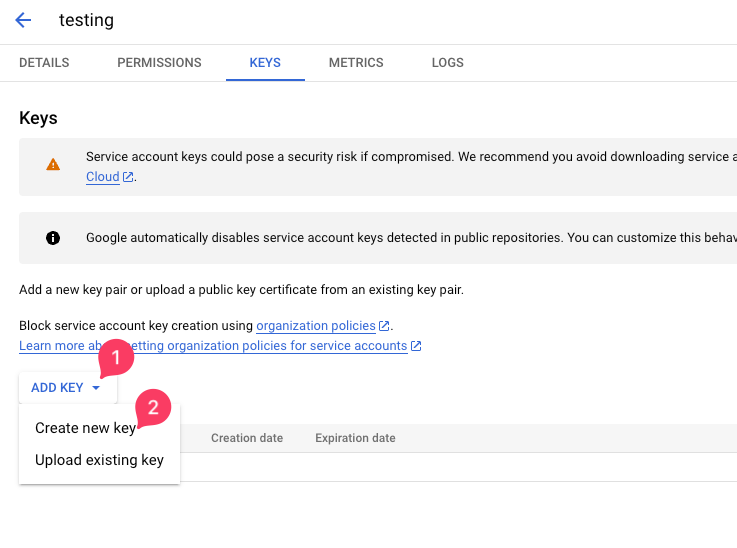
- Select Add key, then select Create New Key. Choose JSON from the popup dialog and hit Create.
- This will download a JSON file. Open the file and copy its contents.
- Paste the content into the firebase json config field in the admin panel.
App Build & Release
Create an Upload Keystore
To create a keystore, run the following command at the command line:
On macOS or Linux, use the following command:
keytool -genkey -v -keystore ~/upload-keystore.jks -keyalg RSA -keysize 2048 -validity 10000 -alias uploadOn Windows, use the following command in PowerShell:
keytool -genkey -v -keystore $env:USERPROFILE\upload-keystore.jks -storetype JKS -keyalg RSA -keysize 2048 -validity 10000 -alias uploadThis command stores the upload-keystore.jks file in your home directory.
- Move the
upload-keystore.jksfile to[project]/android/app/folder for easy management. - Edit the
key.propertiesfile in[project]/android/and update thestorePasswordandkeyPasswordvalues:
				        			storePassword=YOUR_PASSWORD
									keyPassword=YOUR_PASSWORD
									keyAlias=upload
									storeFile=upload-keystore.jks
- Run
flutter clean && flutter pub getin the terminal.
Debug the App
- Open the project in Android Studio and run the app in debug mode.
- You can use an Emulator from Android Studio or connect a physical device.
Build for Android
- For a release build, run the command:
flutter build apk. - The build file location:
[project]/build/app/outputs/flutter_apk/release/app-release.apk. - For deployment, please follow this documentation.
Build for iOS
Follow this guide to build and release the iOS app.
Pre-requisites for iOS
- A valid Apple developer account
- A device that can run Xcode